Showing posts with label crochet. Show all posts

Saturday, January 17, 2015

Rueckblick auf den Herbst - Teil 2

Wie versprochen, hier sind die Bilder mit den anderen Muetzen die ich im Herbst gestrickt (gehaekelt) habe.
Paula hatte ich genau in Erinnerung. Die Farben stehen ihr besonders gut.

Pia ist so richtig typisch 3.

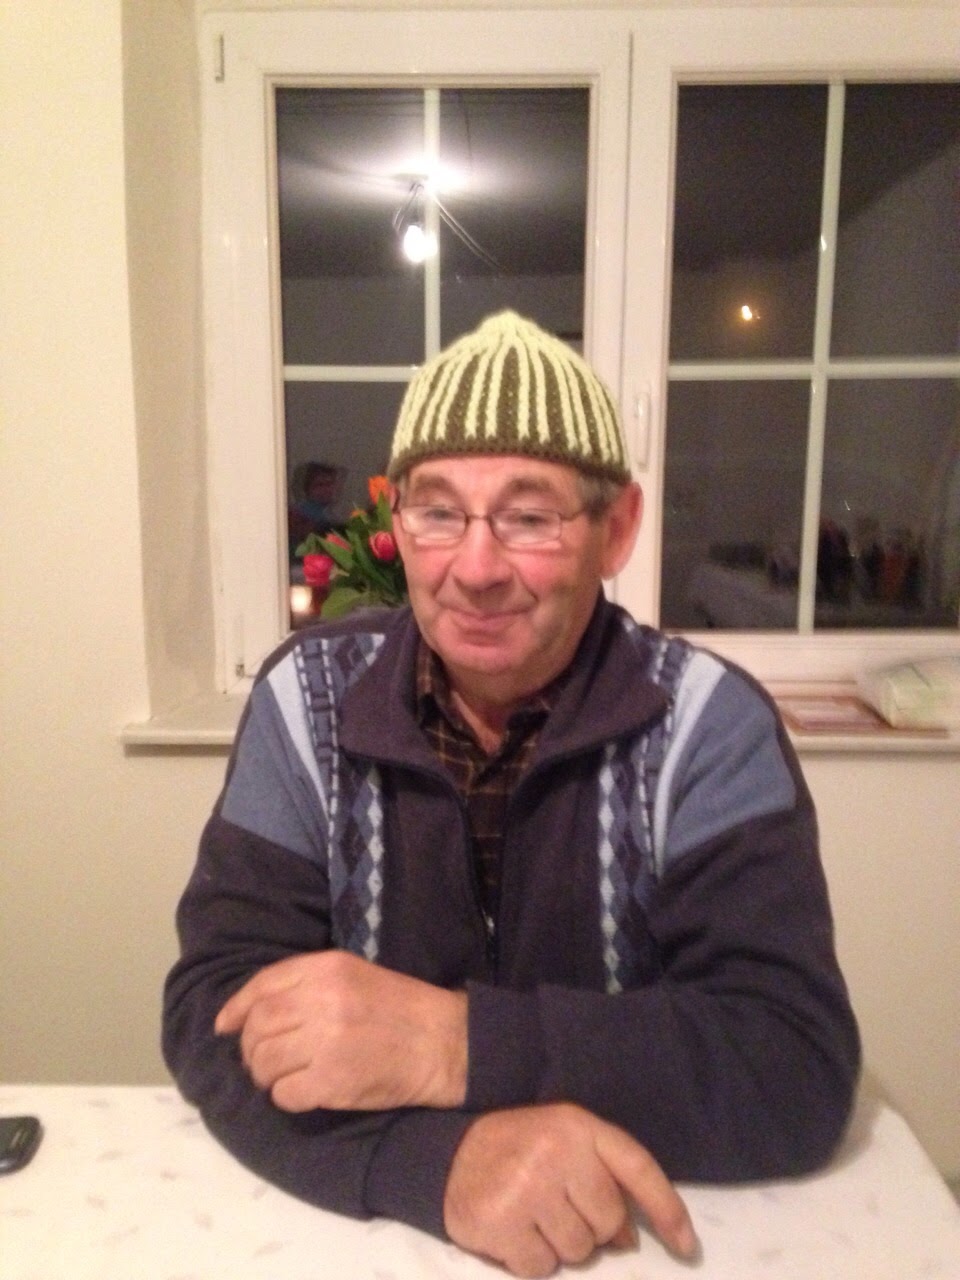
Nein, die Muetze ist nicht zo klein, der Kopf vom Opa Sepp ist zu gross.
Die Muetze war ja fuer den Roman gedacht.

Tuesday, September 30, 2014

San Diego Yarn Crawl 2014

Talk about yarn intertwined with life! here is one of those 'perfect examples'!

Saturday 10:00AM, right after breakfast, we took a ride to Chula Vista. The store was my chosen starting point for the yarn crawl that day. I had never been there before.

They have plenty of parking in the back of the store

The sign in front is big enough, you can't miss it

I was really surprised and impressed with the enormous selection of well-known yarns. Now I know to go to Border Leather and Yarns when I need something unusual and don't want to wait until an on-line purchased package arrives.
We stayed for one raffle drawing, purchased a nice light green ball of wool and went on to the next store on the crawl schedule. The grove at Juniper $ 30th.
I had visited that store many times before. It is located close to my home and 'shop local' is one of my mottos. We found a decorated 'YARNBOMBED' bike stand in front of the store and many people inside. The yarn selection is much smaller there, but I have learned that a local yarn company, Ewe ewe yarn, is carried there.
So if you ever want to get wool for a child project, try http://www.eweewe.com/welcome/

It was still before Lunch - so we went on the next store on my list, Yarn and Thread expressions in
La Mesa.
This is the store I find what I am looking for the most. They have the regular, and the rare yarn. I also like the little poodle that is guarding the cash register. Very sweet little girl.

 
My life is about yarn, intertwined with life. So a visit to my very young friend in Escondido fit right in at lunch time. My little friend Allison is always happy to see me.
 
Parents and Grandparents are all taking a break from packing. Allison's dad is called up to the reserves and I will miss them. At least for a year.
 
Luckily I had the good fortune to spend a little time with the new baby, Adelle.
 
Ruben is a natural
 
La Dolce Vita Alpaca, enjoy the Alpacas. I did!

I even got to touch one, sooooooo soft.

Other's liked it here too.
 
All together that farm has 45 animals. A lot of yarn, I'd say.
 
The guard was on a break, apparently.
This was the day one result. Future socks and hats.

Sunday morning we went to have breakfast on the beach. There is an IHOP very close to the Needlepoint Cottage.
 
Here you will find a large selection of really inexpensive and really expensive yarn. She carries both. She also has a large selection of needle point kits and accessories. This one is always worth a visit when you are just looking for the next project.
 
You never know what you are going to find. I found a book about beading, knitted or crochet beading. Hmm, I wonder if my next project is going to have beads!
 
My new stash.
 
Red Hats, can you see it.
Green hats, just yummy.


Saturday, August 9, 2014

Down-time

It does seem like a long time since I have written in my blog. Much has been happening.
I was not feeling well for a while and it was determined that removing an un-needed organ will alleviate my constant nausea. They were right. My successful operation on July 2nd lead into a successful recovery. My doctor even ask if he could take a picture of my belly button, since it looked to well healed.

I did read a lot while I was waiting to heal....Ken Follett's Saeulen der Erde (Pillars of the Earth). It is more then 1200 pages, really heavy to hold, and it is written in German. What a treat!
When I was done with the entire book, it was time to slowly go back to work.

Before I decided to do the surgery I took on a project I call 'Debbie'. I was planning on crocheting while recovering, but that was not possible. No inspiration at all.

It has been a few weeks now though and the 'Debbie' has been taking shape:


The pentagons are just right to make this little summer jacket look luxurious!

I am glad it is weekend again and I can work on it some more. My sleeves idea needs to be made a reality, and the pentagons still need a small strip of something to be able to attache it to the side seams. The main body work is done, and I am proud of it.
Thank you god for all the inspiration!

Saturday, March 29, 2014

Fuer Brigitte

Deine Frage nach dem kleinen Hut kann ich schon beantworten. Es hat nur ein bischen gedauert bis ich meine handgeschrieben Notizen wieder gefunden habe. Ich schreib mir immer alles auf was ich mit der Stricknadel oder Haekelnadel herzaubere.

Also hier ist das Bild erstmal:


Maschenprobe mit Haekelnadel Nummer 4.25mm.
19 stb x 9 Reihen ergibt 10cm x 10cm

Der Hut wird in Runden gehaekelt, mit der Rechten Seite immer aussen, bis zur letzten Reihe.

Eine Kette mit 4 Lm haekeln.
Reihe 1: 11 stb in die 4. Lm haekeln und dann , die Runde mit einer km in 3. Lm schliessen. Du hast jetzt 12 stb. und die Runde geschlossen.
Reihe 2: 3 Lm, 1 stb in die km der Vorrunde, *2 stb in das naechste stb*, von * bis * noch 11 mal  wiederholden, die Runde mit einer km in 3. Lm schliessen. Das ergibt 24 stb (die 3 lm zaehlen as 1stb) und die Runde ist geschlossen.
Reihe 3: 3 Lm, *2 stb in das stb der Vorrunde 1 stb ins naechste stb*, von * bis * 11 mal wederholden, die Runde mit einer km in 3. Lm schliessen. Das ergibt 36 stb und die Runde ist geschlossen.
Reihe 4: 3 Lm, 1 stb in das stb der Vorrunde, *2 stb in das naechste stb, 1 stb in die naechsten 2 stb*, von * bis * 11 mal wiederholen, die Runde mit einer km in 3. Lm schliessen. Das ergibt 48 stb und die Runde ist geschlossen.
Reihe 5: 3 Lm, 1 stb in jedes der naechsten 2 stb haekeln, *2 stb in das naechste stb und 1 stb in jedes der naechsten 3 stb*, von * bis * noch 11 mal  wiederholden, die Runde mit 2 stb ins letzte stb der Vorreihen und einer km in 3. Lm schliessen. Das ergibt 60 stb und die Runde ist geschlossen.

Reihe 6: 3 Lm, 1 stb in jedes stb der Vorreihe, die Runde mit einer km in 3. Lm schliessen.

Diese Runde nun 5 bis 7 mal wiederholen. Das kommt auf die Groesse des Kindes an. Man kann auch die Runde 6 bis zu 10 mal wiederholen und dann den Rand umgeschlagen tragen.

Letzte Reihe: Den Hut nach der letzten Reihe umdrehen, sodass die Innenseite nun aussen ist. Den hut mit einer Reihe Krebsmaschen beenden. Das heist nun entgegengesetzt von links nach rechts haekeln, 1 lm, 1 fm in jedes stb der Vorreihe, die Reihe mit einer km schliessen. 

Die Blume: 3 lm, 11 fm in die 1. lm haekeln und die Runde mit ein km in 3. lm schliessen.
Reihe 2: 2 lm, 2 hstb in jede fm der Vorreihe haekeln, 1 hstb in dieselbe Masche wo die 3 lm herausgehaekelt wurden, Runde mit 1 km schliessen. Das ergibt 26 hstb., die 2 lm vom Reihen begin zaehlen als 1 hstb.
Reihe 3: 1 lm, 1 hstb in das neachste stb der Vorreihe, "jedoch von hinten einstechen: mit der Nadel ueber das stb wieder nach hinten durchstechen um den Faden von hinten zu holen und durchziehen". Dann 3 stb in das naechste stb haekeln, aber auch hier von hinten nach vorne ueber das stb wieder nach hinten durchstechen um den Faden zu holen. Das Blumenlatt dann noch mit einem hstb in das naechste stb und einer fm um das naechste stb der vorreihe beenden. Alle Maschen werden von hinten ueber das stb der Vorreihe gehaekelt. Jedes Blumenblatt hat 1 hstb, 3 stb, 1 hstb, mit einer fm dazwischen. Es ergibt 7 Bluetenblaetter. Mann kann auch die Bluetenblaetter enger zusammenheakeln, wenn man die fm zwischen den Blaettern nicht haekelt, damit 9, oder 10 Bluetenblaetter entstehen koennen.

Abkuerzungen:
stb = Staebchen
km = Kettenmasche
Lm = Lunftmasche
fm = Feste Masche
hstb = Halbes Staebchen

 Fertig, und viel Spass!

Thursday, December 19, 2013

Ahhhh, and there are the rewards

Many knitters I know (including myself) knit because it makes us calm and provides an outlet for Art. We never really know if we are going to make 1 row or 2 of the 'other' color, if we should knit or purl, and how long until bind off. But we are going forward and 'decide on the fly', we make our Art.
Every Art has its reward, right. The reward I crave and can never get enough of looks like this:

Shelly blanket, hat and booties was a project for a good friend. Her niece was due any day and the crochet items got done, just in time.

One of the larger size Cau Cau Surfer dresses went to fiends in Japan.
you can find the Cau Cau Surfer knitting pattern in my ravelry store.
 
Another of the Cau Cau Surfer dresses went to my favorite little girl, miss Allison.
 
2012
 
2013
This was my first silk project and Allison really wears it well. Year after year
 
Well worth the effort, don't you think?

Sunday, March 24, 2013

cau cau surfer is live

Well, the dress has arrived in Japan and one little girl is wearing it already.
This one was made following the size #3 of the pattern Cau Cau Surfer


It looks like she can go out and play as soon as the weather gets warm there.


This knitting pattern is now available at my ravelry and etsy shops for downloading. I must get back to making one more dress, the #1 size to be ready for Miss Allison's 1st birthday.
You know it is a really good thing that I actually like knitting the patterns I write. This Cau Cau Surfer in particular feels very soft and is flowing easily along on the knitting needles. It is also light and does not weigh much, so your arms are not getting tired as you knit along.
Cau Cau is a beautiful beach in Chile that this hand dyed yarn was created after. The waves, the eucalyptus forests, and the steep hills are all represented in the yarn. With my creation I’ve tried to continue the wave and the forest impressions into the pattern design. I think little girls will love wearing this dress as apron over their formal dress, as summer shirt over shorts, or as a beach outfit. The yarn is made of 60% pima cotton and 40% silk and will feel very soft and always comfortable. Since the yarn is hand dyed it is recommended to alternate between two hanks in assorted rows (2-4). I did not do that. Instead, when winding the hanks into balls, I’ve selected the darker shades for one dress and the lighter shades for another.
It takes 3 skeins for the three smaller sizes and 4 skeins for the size 2-3 years. You can find he yarn on e-bay right now for sale for $8.10 a skein e-bay seller
There are different color combination available from the yarn maker - Araucania

Happy knitting everyone!

Wednesday, December 26, 2012

finishing it

I know finishing work is not only my biggest problem.
Many of my 'knitting' friends tell me the same story: It takes way too long, all the threads to hide, the blocking, the sewing together of all the seams, ....
Well my friends, it is what it is!!!!

With my latest project "little red riding hoody" I shortened the finishing time a little by blocking my work as I finished each piece.


First the back. Then the two front pieces, and then the arms. While the arms dried I closed the shoulder seams and knitted the hood right onto the garment. I did not cast off the middle diamond design stitches on the back piece so I could continue the design into the hood. The button band was knitted on next. I repeated the 8 rows from the jacket and arms edge and added 5 buttonholes in the top half of the hoody. The bottom half remains open.
Once the arms were done blocking I sewed them on. By 'sewing' I mean I crochet them on. I have given-up on using a sewing needle to close any knitting seams. For me the best way is to use a slightly smaller crochet hook and a single crochet stitch to close a seam.
I think you can see in the picture that I did not have the hoodie's side seams closed before sewing on the arms. I also did not have the arm seams closed. I like this method of sewing (crocheting) in the arms open.
It gives me full control over the placement:
-making sure the middle of the arm is placed at the shoulder seam.
-sewing down the back half of the arm and then the front half lets me adjust the arm width to end exactly where I want it to be. It also is much easier to crochet small sections and 'open them again' if it did not quite come out perfectly.


After that I can sit back and take one evening to close the long side and arm seam. All in one. For this little red riding hoody I left a few inches open at the end of the arm's seam and at the other end of the body. That leaves this hoody light any airy. It is not meant to be cuddly warm, rather just a small soft little chill-remover, for evenings near the ocean or cool spring evenings on the porch.

Comparing it to the sketch I made when I first played with the idea of a kimono hoody, this looks a lot like the vision I had. Don't you agree!


I know that the ladies from the Normal Heights knitting group are asking for the pattern. I know, I know. It's time to write it down.
My husband gave me a super Christmas present. It's a Phone and Pad in one, the Galaxy Note II. So guess what! I need to learn how to make the design notes while I am knitting and making the decisions, so I can just push copy - paste and have the pattern already done.
That's the goal for my next project.

But for now I need to get on it. It's time to remember the way I did it, so everyone that wants to make a hoody like this can do it. I am wearing it a few times a week and it goes well with casual and business styles a like.
Oh and Maxy likes me wearing it out on HER walks.

The Pettern is now for sale in German at my ravelry store:
http://www.ravelry.com


Sunday, August 12, 2012

Summer Fun

Yes, I like knitting and traveling
Yes, I do other crafts and projects like crocheting, sewing
Yes, I make it a special mission every year to read at least one book in English and one book in German
and Yes, sometimes another 'new' passion sneaks into my world.

I have discovered cooking soup.
First it was just a few soups to have something different than the same old meat. It was actually my husband's constant searching for 'other' meat that brought my idea to the fore front. Soup can be with or without meat and does not take long at all to prepare, usually about 30 minutes.

I have settled on a few favorites now.
  • Fennel soup, with Fennel, Chickpeas, Tomatoes, Garlic, Chicken broth, and a big Potato
  • Sicilian Wedding soup, with Spinach, baked Meatballs, Noodles, Garlic, Onion, Carrot, and Celery. The broth for this soup can be Chicken broth or Beef broth, both work well.
  • Potato soup, with Potatoes, Leaks, Carrots, Celery, Garlic and Steak strips, Chicken broth, and Onion
  • Chicken Noodle, with Celery, Carrots, Garlic, Chicken pieces, Noodles, and Onion
There was something else that contributed to this soup idea and that was my little raised garden bed out front. I started growing Basil, Tomatoes, Hungarian Peppers, Green Beans, and Chives last year.
All the best ingredients to spice up a home made soup.


on the left, below my porch, my husband built the raised garden bed for my plants

Today, I spent some time at a Nursery to buy this years second growing season plants. I researched on-line that San Diego has the right climate to plant some winter vegetables. This afternoon I was busy planting 2 Tomato varieties, one regular and one purple. The purple came very much recommended from our friend the gardener. I also bought two Pole Beans, and seeds for Cool Weather Pees, and Kohlrabi.

 I have also reviewed some Garden Magazines last month. Hard to believe that there was still time for that between the knitting, the Olympics watching and the finishing my 900+ pages Dragon story book.
In the magazine I found the chairs I wanted for my porch that my husband built for me 2 tears ago.

Finally the right chair, I thought. Luckily there was a store in San Diego that had the chairs. I wanted the yellow ones. The woman at the store recommended to take the chair outside to be sure the color was what I wanted. I am so glad she did that because the yellow was more orange glowing than I wanted. Seeing them up close and in the sunshine made me change my mind. The ones I bought are red and beautiful.

Now I sit out there in the morning shade and cool air to celebrate the beginning of
another day with the first cup of coffee

As you can see the chairs are also used for modelling some of my knitted wares, like the Poncho I made years ago

Don't you agree the icicle shawl from 2007 does look better on the chair than on me


Tuesday, May 22, 2012

giving and receiving things made of yarn

The other day I received an e-mail from a Ravelry.com 'group'. The 'German knitters living in America' group decided to organize a pot holder gift exchange (German word is 'Wichteln'). I was asked if I want to participate, and I could not resist. The rules were really simple, create a pot holder, add some little gift from your kitchen and mail it to someone else that is participating in the exchange. The organizer will send you the address that you need to send your package to.
Great!
I loved making the pot holder and I sure love the pictures that are published every time a 'Wichtel' member receives a surprise package. Everyone that made a pot holder will receive one, but don't know from whom, what it will look like, or what the additional surprise gift will be. I was so eager and it did not take any time at all to crochet my potholder. I made it double thick so it can actually be used without burning your hand. 

the front side is a simple flower in a frame

the backside is solid yellow cotton


The gift item from my kitchen turned out to be two little tea lights and an unopened package of bamboo skewers. Since my package was going to Texas, BBQ skewers seemed the perfect gift.


this is how the package arrived at my 'Wichtel' partner
 Wiebke assured me the skewers will be heavy with meat on a grill this weekend. BIG SMILES for ME.
I like giving away things I make.
It's one of the biggest joys in life, I think..........

Now I am eagerly awaiting my pot holder. I don't know what it will be like, when it will arrive, or what will be in the package with it. Anticipation, another joy in life, right.......

Saturday, May 12, 2012

Finishing Your Work

My mother has found the easiest way to finish her knitting projects. She has a Phildar-Wolle store around the corner, just a few yards away from her front door. So naturally she brings her work to the store and let's the experts finish her work.
For most of us that is not possible and we must finish our own knitting projects. Over the years I have found one easy way: I use a crochet hook
Select a hook that is just one size smaller than the knitting needles and gather-up 8-10 (less with fine yarn, more with bulky yarn) approaching the spot in the knitting were the yarn ends. Then you simply hook the yarn onto the crochet hook and feed it through the gathered stitches.
I also use the same hook to close up the seams, and attach the arms. Using a single crochet stitch I just crochet all the seams together. To make sure the seams do not get too tight or too loose, I first pin the seams together with safety pins or knitting markers. Then check I the work every two inches by laying it flat on a table. You will be able to see right away if you should add a crochet stitch every inch (when the seam too tight and the work does not lay flat) or if you should use a smaller hook and decrease the stitches (when the seam is wavy and wrinkled and the work does not lay flat).
You might think but that means: 'I have to open the seam again'. And luckily you can using the crochet method. If you have used the finishing method of sewing your seam together with a tapestry needle you will be trying to undo stitches that are barely noticeable and that is truly hard and really time consuming.
I think the Crochet method is the easiest and have been using it for many years. Try it!


After all seams are joined it is time to decide what the collar should be like and if it is a sweater with buttons or zipper closure, the front has to be knitted.
With my Baby dress project I decided not to follow the pattern of knitting a ribbed right and left band and then sew that on.
Since the dress had this waistband design I decided to mirror that waistband as the button band.
I gathered up 'enough stitches and then added the right amount of stitches when knitting the first row to have the perfect size band'. How to do that is not hard at all.
From the trial 4" x 4" (or 10cm x 10cm) piece, I know that it takes 22 stitches to over 4" (or 10cm). The overall length of the Baby dress is 24cm.
So the final stitch number has to be 22 x 2.4 = 53
In the case of the Baby dress, the knitting had 43 rows. I was able to gather up 44 stitches from the garment and added 9 stitches evenly during the first row knitting. (every 5 stitches I added one)
Next I had to consider the button holes on the right band. I needed 5 evenly spread out. I started by simply laying the buttons on the dress where I thought they should be. I measured the distance from the middle of one button to the middle of the next button and found that it all works out this way during row 4 of the pattern:
knitting from the bottom up six stitches, cast off three (for the first button hole) knit 8, cast off three (button hole 2) knit 8, cast off three (button hole 3), knit 8, cast off three (button hole 4), knit 8, cast off three (button hole 5) ending with three stitches.
Sometimes the calculator is not the right tool. So don't worry and just lay it out on a table until it looks the way you want it to look then just count out the stitches and GO FOR IT.
As you can see, it turned out great.


If you are not successful, e-mail me.
I can guide you through it.